
Team Building and Air Consumption Drill
By Dan Haley and Chris Naff
St. Johns County (Fla.) Fire Rescue Department
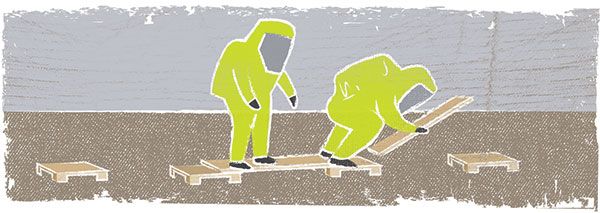
Frequently on an emergency scene, several different crews must work on different tasks that affect the overall outcome. The following exercise is designed to foster team building within a crew and between two separate crews working on a mutual scenario—but in opposite directions. It requires communication and cooperation both within the crew and then between crews as the teams bypass each other.
This exercise is also designed as an air consumption drill. Participants work though the scenario in full Level A chemical protective clothing and self-contained breathing apparatus (SCBA) while performing physical and mental exercises.
Setup: Wood piers (12”x12”) are arranged in a horseshoe pattern and spaced approximately four feet apart on center. The 11th pier is offset between the 10th and 12th piers.
Tip: Begin at the midpoint and work toward the start. There will be 16 piers per side.
Place two hand tools—hazmat-related, typical down-range tools—and two heavier pieces of hazmat equipment—something that can be carried, or you can use hose loads—at the top of the horseshoe (midpoint).
Each team has two 2”x10”x4’ boards, designated alphanumerically or by color. The boards are placed with one end resting approximately 2-4 inches on the starting pier and the opposite end on the ground, creating a ramp.
Tip: Place the boards slightly offset to allow for the first bridge to be built.
Scenario: Teams of two begin on opposite ends of the course, standing on the ground. When directed, they step onto the boards and begin to build bridges with the two boards. Each team at the top of the horseshoe picks up one hose load and one hand tool. The teams continue all the way around the horseshoe and then return to their original starting positions.
The opposing teams must bypass each other twice along the course, requiring them to work together for the overall success of the mission. Penalties (optional) such as air squats, pushups, etc., can be assessed if participants fall off the boards.
Back to Top
If Chemical Protection Is Your Goal, Permeation Is Your Test
By The Glow Worm Editors
When selecting personal protective equipment (PPE) to protect workers from chemical hazards, there are a range of available garment fabric technologies. So it’s critical to ensure that the products you choose provide adequate protection from the chemicals of concern.
There are many recognized test methods used to evaluate the performance of protective garment materials. The two most common test methods cited by manufacturers of chemical PPE are ASTM Method F903, Standard Test Method for Resistance of Materials Used in Protective Clothing to Penetration by Liquids, and ASTM Method F739, Standard Test Method for Permeation of Liquids and Gases through Protective Clothing Materials under Conditions of Continuous Contact.
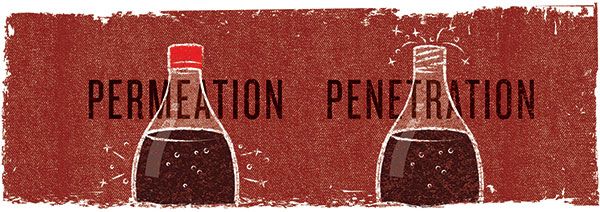
While both are official ASTM test methodologies, permeation is the more rigorous test and represents the actual evaluation of the chemical resistance of protective garment fabrics. Permeation is the absorption, diffusion and desorption of a chemical through a barrier material at the molecular level. Penetration, on the other hand, is the bulk passage of a chemical through a pore or opening in the barrier material.
The following is a real-life example to help you understand the difference between these two barrier mechanisms. Have you ever opened a bottle of soda, only to discover that it’s flat? There aren’t any holes in the bottle. The cap seal is not broken. The liquid is still inside. Why is the soda flat? It’s flat because the carbon dioxide that gives soda its fizz has permeated through the bottle over time. If you opened a fresh bottle of soda and did not replace the cap, the carbon dioxide would escape out of the top of the bottle. That would be penetration.
The bottom line is that permeation tests are best suited for evaluating the chemical resistance of protective garment fabrics against hazardous liquids and vapors. DuPont publishes permeation data for its chemical protective garments.
Back to Top
Multiple-Use, Single-Exposure (MUSE) Garment Options
By Mark Tartaglia
MSPH, CIH, Senior CIH Consultant
It’s fairly common for DuPont to receive inquiries from end users who are interested in what reusable garments we offer. Fact is, we don’t offer reusable garments per se, but can usually recommend options that will meet these users’ needs.
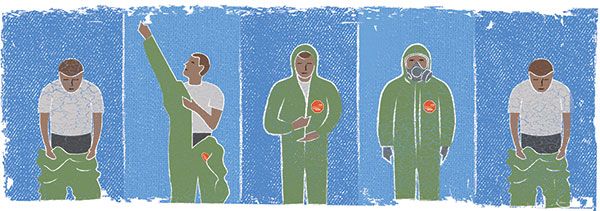
Overall, DuPont apparel options are divided into “single-use” and “limited-use” garments. Limited-use garments—also referred to as multiple-use, single-exposure (MUSE) garments—can be worn until they are damaged, altered or contaminated. Generally speaking, they are sufficiently durable to be worn several times.
MUSE garments often satisfy the end user’s desire to have a garment that can be used more than once. Typical applications include line breaking, loading/unloading operations and other closed chemical transfers where the primary risk is accidental exposure to the hazards present.
A number of DuPont protective garments fit this description. There is one caveat, though: garments that feature storm flaps with taped closures can’t be reused if removal causes any damage to the garment. Still, that leaves many excellent options for the end user.
Back to Top
Hazmat Through History: Lead Poisoning
By Daniel Hammel
Garments Inside Sales Manager, DuPont Protection Solutions

We all know that lead is hazardous to our health, but have you ever wondered why children feel compelled to eat lead paint chips? The answer is actually pretty simple: Lead tastes good. Lead is naturally sweet, so young children (who are always putting random things in their mouths) learn that the taste of old paint chips is enjoyable. As we look back in history, we find that children are not the only ones guilty of enjoying the sweet taste of lead.
There is evidence that lead has been used in a variety of applications for thousands of years. Ancient Romans used it in their pipes, coins, pots and dishes. Lead became an ingredient in paint beginning in the 1600s, adding durability and richness of color. Glassmakers also added it to their wares, such as wine decanters. The lead would make the glass decanters glisten, and wine enthusiasts found that the longer their wine remained in the decanter, the sweeter it became. Of course, improved taste came at a steep price. Lead poisoning causes abdominal pain, nausea, vomiting, headaches, memory problems and sterility. Severe cases can result in death. Children absorb the toxin at a faster rate than adults, putting them at even greater risk.
Today, we no longer produce lead paint, but houses built before 1978 may still have lead-based paint inside or outside. State and local governments may require a lead abatement project if a case of lead poisoning occurs. Individuals and companies may also voluntarily choose to remove lead paint from existing structures.
To find out which DuPont products offer suitable protection for lead abatement, visit www.SafeSPEC.DuPont.com
Products and/or sales questions?
Share your stories, tips and tricks.


Resource library
Find technical information, videos, webinars and case studies about DuPont PPE here.